Monday, January 31, 2011

January's Pizza del Mese: Pizza Margherita


As I mentioned previously, co-blogger Rebecca gave me a Lodge Pro Logic Cast-Iron 14-Inch Pizza Pan for Hanukkah/Christmas/Solstice/Kwanzaa/New Year 2010. My goal this year is to post once a month about my experience making a pizza from scratch. After my wonderful experience last year with The Ultimate Chocolate Cookie Book: From Chocolate Melties to Whoopie Pies, Chocolate Biscotti to Black and Whites, with Dozens of Chocolate Chip Cookies and Hundreds More by Bruce Weinstein and Mark Scarbrough, I purchased their book Pizza: Grill It, Bake It, Love It! to help me on this journey. I'm starting with the classic Pizza Margherita.

Pizza: Grill It, Bake It, Love It! by Bruce Weinstein and Mark Scarbrough goes into intricate detail on how to make pizza using fresh dough or prebaked crust, in an oven or on a grill, with a pizza stone or on a pizza pan, and every permutation thereof. This is awesome. Over the next 11 months I plan to explore most, if not all, of those permutations. In my blog posts I'll only include the instructions for the crust and cooking method that I actually used. But please know that the book contains a lot more information, so if you want to know more about how to make the pizzas I make here a different way, please check out the book. Like the old Ragu commercial said, "It's in there."

My inaugural pizza was a success. The cheese--fresh mozzarella from The Cheese Cave--was melty and stretchy and delicious. The crust was crisp. I was a little bummed that I didn't get a more doughy edge, but I think that was because I made the whole crust the same depth. I might try to bulk up the edge next time. The sauce was deliciously sweet even with the addition of the optional 1/2 t red pepper flakes. The only change I'd make in my future Pizza Margheritas is my choice of dry spice. I went with 1/2 t freshly ground black pepper from Penzeys Spices. It was great, but a little too hot for my taste. I'll try 1/4 t freshly ground black pepper and 1/4 t Penzeys granulated garlic powder on my next one.

N.B., the dough takes 1 1/2 hours to rise, so plan ahead so you don't end up ordering out for pizza while you wait for your dough to rise. Instead, make your sauce while the dough rises. The sauce has to simmer for about 30 minutes and cool for another 10, so that should kill some time while you wait for your dough to rise. Of course, you'll only have to make the sauce once because it yields enough for about four pies. You can freeze the remainder in 3/4 C portions--which is the recommended amount for a Pizza Margherita--for up to 3 months.

Pizza Margherita adapted from Pizza: Grill It, Bake It, Love It! by Bruce Weinstein and Mark Scarbrough

Ingredients

  • Vegetable oil to apply to the cooking surface of Lodge Pro Logic Cast-Iron 14-Inch Pizza Pan
  • One recipe Classic Pizza Dough (see recipe below)
  • 3/4 C Classic Pizza Sauce (see recipe below)
  • 1 T minced fresh basil leaves
  • 1/2 t freshly ground black pepper, or garlic powder, or onion powder, or red pepper flakes, or mild or hot paprika
  • 8 oz. fresh mozzarella, thinly sliced

Procedure
  • Position the rack in the center of the oven. Preheat the oven to 450. Apply a thin coating of vegetable oil to the surface of the cast iron pizza pan. Lay the dough at its center and dimple the dough with your fingertips. Then pull and press the dough until it forms a 14-inch circle on the pizza pan.

  • Ladle the pizza sauce into the middle of the dough, then use the back of the ladle to spread the sauce evenly, leaving a border of about 1/2 in. around the edge. Sprinkle with the minced basil and one of the other spices, then lay the mozzarella slices on top.
  • Place the pie on its pizza pan in the oven on the middle rack. Check it about every three minutes for the first nine minutes to pop any air bubbles that may blow up at its edge or across its surface. Bake until the cheese has melted and is bubbling and the crust's edge is golden brown, 16 to 18 minutes.
  • Transfer the pizza pan to a wire rack to cool for 5 minutes. Remove the pie from the pan, transferring it directly to the wire rack to cool completely. Transfer the pie to a cutting board to slice the pizza into wedges to serve.


Classic Pizza Dough adapted from Pizza: Grill It, Bake It, Love It! by Bruce Weinstein and Mark Scarbrough

Ingredients
  • 2/3 C lukewarm water (between 105 F and 115 F)
  • 1 1/2 t active dry yeast
  • 1/2 t sugar
  • 1/2 t salt
  • 1 C bread flour
  • 1 C all-purpose flour, plus additional for dusting
  • Vegetable oil

Procedure
  • Fill the bowl of a stand mixer with warm tap water, drain it, and dry it thoroughly. Stir the water, yeast, sugar, and salt together in the bowl just until everything is dissolved. Set aside at room temperature for 5 minutes to make sure the mixture bubbles and foams. If it doesn't, either the yeast expired or the water was not the right temperature. Throw the mixture out and start again.
  • Add both flours, attach the dough hook, and beat at medium speed until a soft dough forms. Continue beating, adding more all-purpose flour in 1 T increments if the dough gets sticky, until the mixture is soft and elastic, about 6 minutes.
  • Wipe a clean, large bowl with a bit of cooking oil on a paper towel. Place the dough in the prepared bowl, turning the dough so all sides are coated with oil, and cover the bowl with plastic wrap. Set aside in a warm, draft-free place until doubled in bulk, about 1 1/2 hours.

I find yeast kind of amazing. You'd think after my recent explorations with lactic acid bacteria, that using microorganisms in cooking wouldn't rock my world. And yet, it does. The above photo was taken after allowing the yeast to do its thing in lukewarm water with salt and sugar for five minutes. It doesn't look "bubbly" to me. Maybe foamy. When I took the spatula out I could see the foam adhere to it, which was reassuring, even though I bought fresh yeast just for this dough.
After adding both flours and mixing with the dough hook for well over two minutes, this confetti like substance is what I had. Maybe my unprofessional flour scooping resulted in too much flour. Or in Southern California the flour is drier. Either way, I ended up adding 1 T plus 1 t lukewarm water before it all came together.
Here's the dough post-kneading and pre-rising. I always get annoyed by instructions to allow the dough to rise until it has doubled in volume. I just cannot eyeball that sort of thing. Is there some sort of special bowl you could make with some sort of markings that would indicate a doubling of volume?
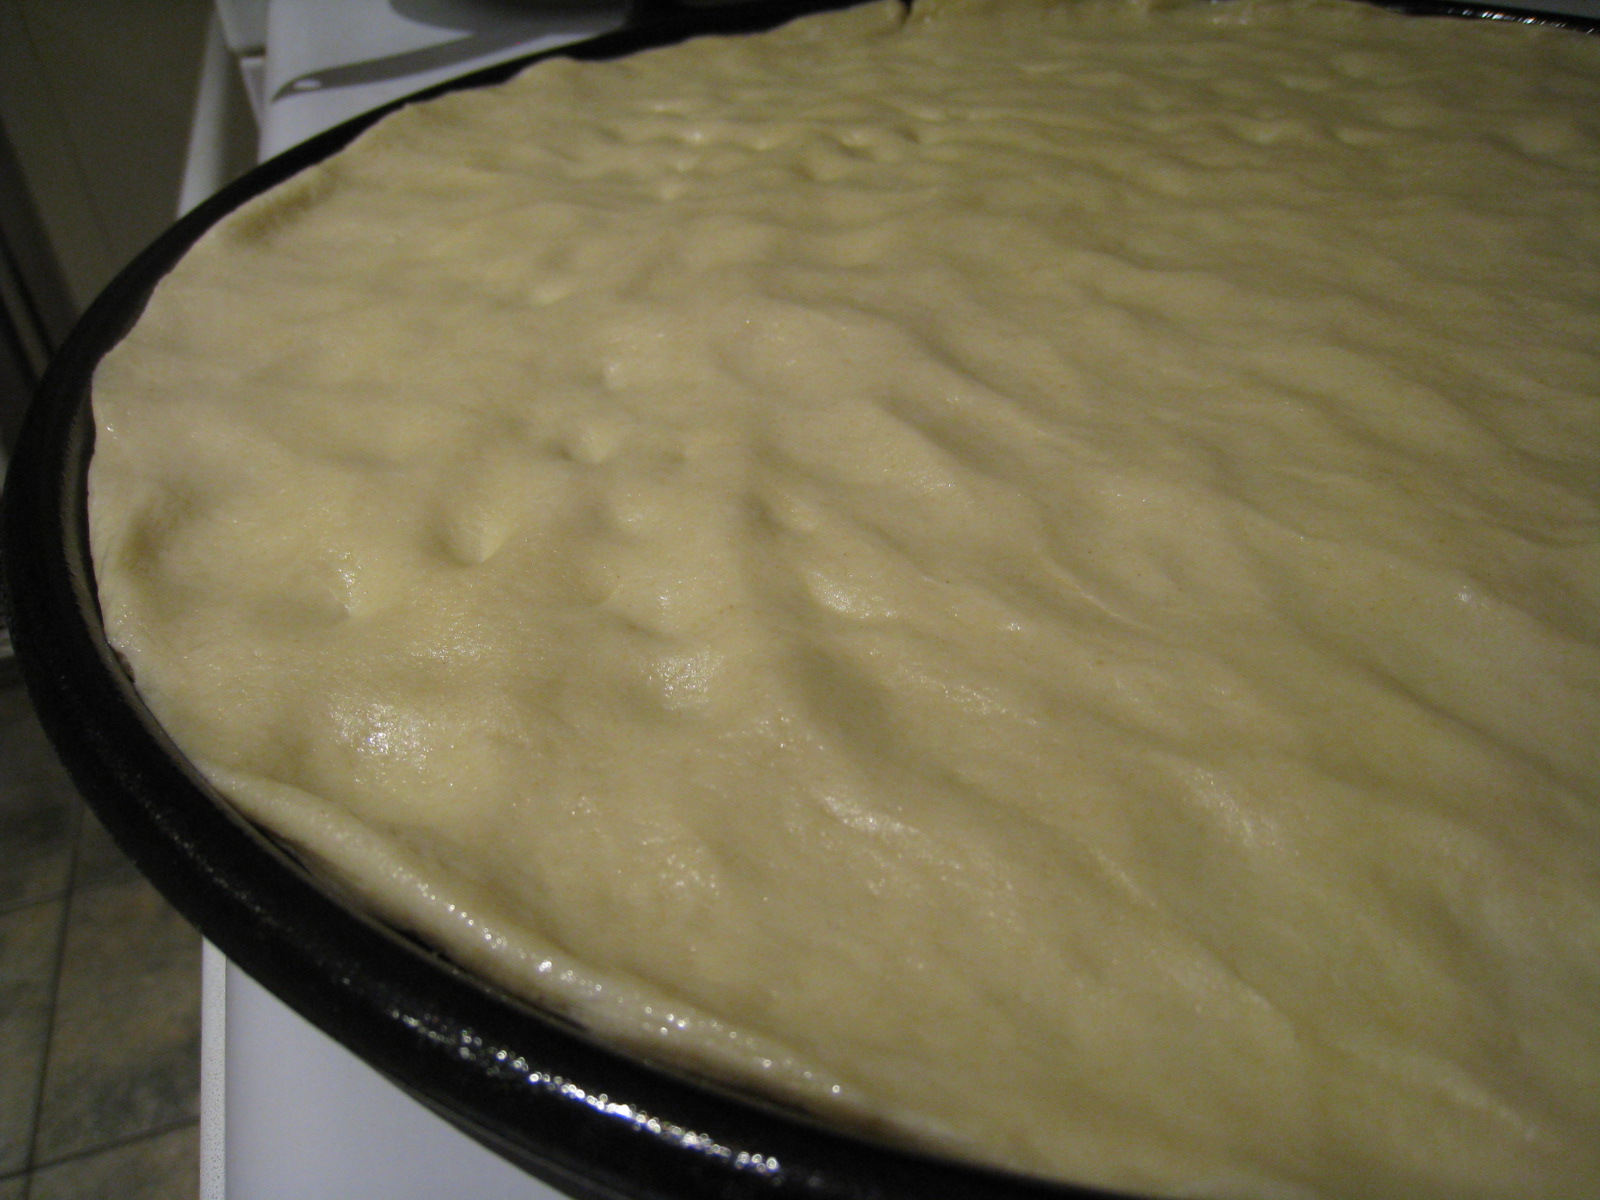
Of course, I can't follow directions to let the dough rise for an hour and a half. I forgot about it for two and a half hours. What are the repercussions of allowed dough to rise excessively? And due to my busy-mom cooking schedule the dough was all risen a good two hours before I was ready to make my pizza. I just popped the dough in the refrigerator to slow the rising process . . . like with yogurt, right?

Classic Pizza Sauce adapted from Pizza: Grill It, Bake It, Love It! by Bruce Weinstein and Mark Scarbrough

Ingredients
  • One 28-oz. can reduced-sodium crushed tomatoes
  • 3 T olive oil
  • 1 T sugar
  • 2 t dried basil
  • 1 t dried oregano
  • 1/2 t salt
  • Up to 1/2 t red pepper flakes, optional
  • 1 garlic clove, minced

Procedure
  • Mix all of the ingredients in a large saucepan set over medium-high heat. Bring to a simmer, stirring occasionally.
  • Set the lid askew, reduce the heat to low, and simmer slowly, stirring occasionally, until the tomatoes have broken down into a somewhat thickened sauce, about 30 minutes. Cool for 10 minutes before using, or store, covered, in a plastic container in the refrigerator for up to 3 days.

Click here to see the rest of this post...

Sunday, January 30, 2011

Yogotherm Yogurt


For my first venture with making yogurt in the Yogotherm, I decided to go with whole milk yogurt, primarily to give my 10 month old son. This would be his first yogurt. It was a success! I was a little nervous about having the yogurt set properly in the Yogotherm, but it worked beautifully. I used the Y4 yogurt culture which is described as tangy, but since I used 2 quarts of whole milk to make the yogurt, I found it fairly mild. I strained some and made greek style yogurt which we ate with honey for dessert one night.


I have successfully made yogurt in an electric yogurt maker, but it makes yogurt in individual containers, which I thought might be larger than the baby would eat. Turns out, he can pack away the yogurt:


2 quarts of yogurt is a lot of yogurt. I took advantage of the other recipes in the yogurt section and make the yogurt muffins and the yogurt dressing. The muffins were good, but I only had giant raisins and they were not a good choice. I think I would actually like the muffins better without any fruit in them and maybe a little cinnamon. They didn't keep very well and were stale before we ate them all.


I made the dressing with dill instead of chives and parsley and it was tasty. I definitely liked having beets on the salad because the yogurt dressing is a little tart.


When I've made yogurt previously, I made vanilla yogurt. I started with 2% milk (my yogurt maker makes seven 6 ounce containers of yogurt so I used 42 ounces of milk) and I added 1 teaspoon of vanilla and 2-4 tablespoons of sugar, depending on my mood. The dehydrated yogurt culture at the local store is pretty tart.

Recipes from Ricki's Dairy Kit

Yogurt Muffins
1 cup yogurt
1/2 cup sugar
2 eggs, beaten
1 cup raisins
1 teaspoon baking soda
1 teaspoon cream of tartar
1 1/2 cups flour
1/4 vegetable oil
pinch of salt

Mix until lumpy. Bake at 400 degrees for 20-25 minutes. Makes 12 muffins.


Yogurt Salad Dressing
1 cup yogurt
2 Tablespoons white vinegar
1 1/2 Tablespoons lemon juice
1/8 teaspoon pepper
2 Tablespoons chopped fresh dill
salt

Combine all the ingredients and mix well. Refrigerate.

Posted by Picasa

Click here to see the rest of this post...

Saturday, January 29, 2011

January's Au Lait du Mois: Yogurt


As I mentioned previously, co-blogger Rebecca gave me Ricki Carroll's Gourmet Home Dairy Kit for Hanukkah/Christmas/Solstice/Kwanzaa/New Year 2010. My goal this year is to post once a month about my experience making either a soft fresh cheese or another dairy treat with the Gourmet Home Dairy Kit. Rebecca has gamely agreed to post her experiences too, as she has a Kit of her own. I'm starting with yogurt as I am already somewhat familiar with the process.

Many moons ago I posted about Jennifer Reese's piece for Slate comparing the wonders of homemade versus store bought foodstuffs including yogurt, which provided both a price comparison and a taste comparison, as well as links to recipes. She comes down heavily on the side of making your own yogurt. Reese's section on yogurt is a must read.

I made my first yogurt about five months ago following the instructions put forth by Ruth Yaron in Super Baby Food. Here is my Southern California Summertime version of yogurt adapted from Super Baby Food.
Ingredients:

  • 2 qt. raw milk
  • 1 container Stonyfield Farm Oikos organic, 0% fat, Greek yogurt

Implements:
  • 2 qt. glass jar
  • Pot that glass jar can fit into and be 2/3s covered in water.
  • Dairy Thermometer
  • Spoon
  • Plastic wrap
  • Rubber band
  • Measuring spoons
  • A small bowl

Procedure:
  • Strain milk through sieve into a 2 qt. glass jar.
  • Put the jar into a pot of boiling water for 10 minutes.
  • While milk is boiling, take Oikos out of fridge.
  • After milk has boiled for 10 minutes, take the jar out of the pot and put thermometer in the milk. Cover the top with plastic wrap secured with a rubber band. Put the jar in the fridge.

  • When the milk's temperature gets down to 112 F (to go from 200 to 115 degrees it takes about 1 hr. 45 min. in the fridge), add 1 T Oikos per 2 C of milk. Take a little of the milk, mix it with the yogurt in a bowl, then stir it gently into the milk.
  • Put the thermometer in the milk and recover the top with plastic wrap secured with a rubber band. Place the yogurt in the sunniest spot on the back porch and check occasionally that the milk's temperature doesn't dip below 90 degrees. If it gets close to 90, put the jar in a pot of water on the stove to warm, but not above 120 F.
  • After 6 hours, start checking hourly for doneness by touching the top with your clean finger. It should have a thick pudding-like consistency.
  • When it is at the correct consistency, put the jar in the freezer for 10 minutes, then put it in the fridge.


Ricki Carroll's Gourmet Home Dairy Kit has one definite advantage over the Super Baby Food method: the Yogotherm yogurt incubator allows you to do this in places other than Southern California on a summer day. Also, the dairy thermometer that comes in the kit ROCKS! So much better than my all-purpose instant-read thermometer.

Other than slight modifications in the yogurt making process, the other big difference (so long as we're all using cow's milk) is the cultures. Harold McGee's On Food and Cooking: The Science and Lore of the Kitchen gets into quite a bit of detail on the exciting bacteria in fermented milk products.
Early in the 20th century, the Russian Nobelist Ilya Metchnikov (who discovered that white blood cells fight bacterial infection) gave a scientific rationale to [the belief that yogurt and other cultured milks can actively promote good health], when he proposed that lactic acid bacteria in fermented milks eliminate toxic microbes in our digestive system that otherwise shorten our lives. Hence Dr. James Empringham's charming title of 1926: Intestinal Gardening for the Prolongation of Youth.

Metchnikov was prescient. Research over the last couple of decades has established that certain lactic acid bacteria, the Bifidobacteria, are fostered by breast milk, do colonize the infant intestine, and help keep it healthy by acidifying it and by producing various antibacterial substances. Once we're weaned onto a mixed diet, the Bifidobacterial majority in the intestine recedes in favor of a mixed population of Streptococcus, Staphylococcus, E. coli, and yeasts. The standard industrial yogurt and buttermilk bactera are specialized to grow well in milk and can't survive inside the human body. But other bacteria found in traditional, spontaneously fermented milks--Lactobacillus fermentum, L. casei, and L. brevis, for example--as well as L. plantarum from pickled vegetables, and the intestinal native L. acidophilus, do take up residence in us. Particular strains of these bacteria variously adhere to and sheild the intestinal wall, secrete antibacterial compounds, boost the body's immune response to particular disease microbes, dismantle cholesterol and cholesterol-consuming bile acids, and reduce the production of potential carcinogens.
McGee laments the industrialization of yogurt production to the extent that it has reduced the commonly used bacteria to two: Lactobacillus delbrueckii subspecies bulgaricus, and Streptococcus salivarius subspecies thermophilus. Oikos, which I used as my starter in the recipe above, contains five live active cultures: the two common industrial yogurt bacteria--L. bulgaricus and S. thermophilus--two found in traditional, spontaneously fermented milks--L. casei and L. acidophilus--as well as Bifidobacteria. Ricki's Yogurt (Y4) Tangy culture which came in the kit says it contains "s.thermophilus, l. delbrueckii, s.bulgaricus, s.lactis." This labeling might include a typo. Lactobacillus delbrueckii subsp. bulgaricus is one bacterium, not two. Ricki also sells two other yogurt cultures. The following table shows which yogurt or yogurt cultures contain the six bacteria I found.


Streptococcus salivarius subspecies Thermophilus Lactobacillus delbrueckii subspecies bulgaricus Lactobacillus acidophilus Lactobacillus casei Bifidobacterium Lactococcus lactis
Oikos Yes Yes Yes Yes Yes
Ricki's Y4 Yes Yes


Yes
Ricki's DS Yes Yes Yes
Yes
Ricki's Bulgarian Yes Yes


Trader Joe's European Style Organic Whole Milk Yogurt Yes Yes Yes
Yes

I modified Ricki's instructions slightly based on my reading of On Food and Cooking. As McGee explains, there are basically two steps to yogurt making: heating the milk and fermentation.

Ricki has you heat the milk to 185 F and then let it stand for 10 minutes. She specifically tells you NOT to boil the milk. So she would disapprove of my previous yogurt making practice. I originally boiled my milk for 10 minutes because that is how Super Baby Food suggests one pasteurize raw milk prior to making it into yogurt. McGee explains that heating the milk to 185 degrees for 30 minutes or 195 degrees for 10 minutes improves
the consistency of the yogurt by denaturing the whey protein lactoglobulin, whose otherwise unreactive molecules then participate by clustering on the surfaces of the casein particles. With the helpful interference of lactoglobulins, the casein particles can only bond to each other at a few spots, and so gather not in clusters but in a fine matrix of chains that is much better at retaining liquid in its small interstices.
To pasteurize raw milk McGee explains that it could be heated to 145 F for 30 to 35 minutes or 162 degrees for 15 seconds. So heating the raw milk to 195 degrees for 10 minutes both pasteurizes the milk and improves the consistency of the resulting yogurt.

Ricki suggests you cool the milk to 110 degrees and then transfer it to the Yogotherm to begin the fermentation process. Super Baby Food has you add the yogurt once the milk's temperature dips below 112 degrees, but as you're not incubating the milk, it focuses on keeping the milk above 90 degrees. According to McGee, the maximum temperature the bacteria will tolerate is 104 to 113 degrees F. At these higher temperatures he notes that the milk proteins gel quite quickly, as in under 3 hours. Super Baby Food suggests that the warmer the fermentation temperature, the tarter the yogurt. McGee explains that at 86 degrees F the milk proteins can take up to 18 hours to gel, which
produces a finer, more delicate, more intricately branched network whose individual strands are weaker but whose small pores are better at retaining whey.
Super Baby food suggests that the cooler the fermentation temperature, the sweeter the yogurt. I let the milk cool to 103 degrees - one degree below the high temperature range McGee specified - before transferring it to the Yogotherm. As this was my first time out with the Yogotherm, I wasn't sure how well the milk would retain its temperature, so I didn't want to let the milk get too much cooler for fear it would drop below 86 degrees and the bacteria would become inactive.

After 9 hours, the Yogotherm maintained the fermenting milk at above 90 F. While the milk had thickened slightly, it was nowhere near as close to being done as when I used the Oikos starter. I thought I might have put in the Y4 while the milk was still too hot and ruined my batch of yogurt. But then I talked to my friend Bridget and she said she too had to wait a much longer time for her yogurt to thicken with Ricki's cultures than with yogurt starter.

After 18 hours the Yogotherm maintained the yogurt at above 82 F, so the cultures were no longer active, but it was still 17 degrees warmer than the ambient temperature in the room. More importantly, after 18 hours the yogurt had set beautifully. It was smooth, sweet, and retained the whey very well. The McGee-ification of the recipe was definitely worth the extra effort. I prefer the bacteria available in Oikos as well as the shorter incubation period compared to Ricki's Y4 culture. Once I run out of her Y4 cultures, I'll go back to using Oikos as my starter. Either way, I'm totally hooked on homemade yogurt. And our wee bairn goes through two quarts in about a week anyway, so the quantity is just right.

Yogurt adapted from Ricki Carroll's Gourmet Home Dairy Kit and Harold McGee's On Food and Cooking: The Science and Lore of the Kitchen
Ingredients:
  • 2 qt. raw milk
  • 1 packet Yogurt Direct Set Culture

Implements:
  • sieve
  • 2 qt. pot
  • 2 qt. glass jar
  • Dairy Thermometer
  • Spoon
  • Plastic wrap
  • Rubber band
  • Yogotherm yogurt incubator

Procedure:
  • Strain milk through sieve into a 2 qt. pot and affix the thermometer in a readable position.
  • Put the pot on medium heat and stir occasionally until it reaches 195 degrees. Maintain 195 degrees for 10 minutes by moving the pot on and off the burner while stirring constantly.
  • After milk has been at 195 degrees for 10 minutes, pour it into a 2 qt. jar and put thermometer in the milk. Cover the top with plastic wrap secured with a rubber band. Put the jar in the fridge.
  • When the milk's temperature gets down to 103 F, pour milk into the Yogotherm yogurt incubator.
  • Add the packet of Yogurt Direct Set Culture and stir thoroughly.
  • After 6 hours, start checking hourly for doneness by touching the top with your clean finger. It should have a thick pudding-like consistency.
  • When it is at the correct consistency, put the Yogotherm insert in the fridge.


Edited 1/30/2011 to add:
Cultures for Health sells a number of interesting yogurt starters including their Vili Yogurt Starter, which contains Lactococcus lactis subsp. cremoris, Lactococcus lactis subsp. lactis biovar. diacetylactis, and Leuconostoc mesenteroides subsp. cremoris.

Edited 2/2/2011 to add:
My friend Bridget just recommended The Cheesemaker as a source for various cultures. She gets her brie cultures and whatnot from The Cheesemaker. He does have some yogurt cultures for sale.

Click here to see the rest of this post...

Friday, January 21, 2011

CSA Basket 21

This week's basket contained: Kale, Kohlrabi, Lettuce, Parsley, Fennel, Broccoli, Valencia Oranges, Potatoes, Lemons, Apples, Pears, Carrots, Celery, Spinach, Onion, Satsuma Oranges, and Grapefruit. I traded in the parsley and fennel (there were actually two fennel) for a head of garlic, another bunch of kale and another bunch of spinach. Now that the wee bairn is up to eating a quarter cup of pureed kale a day, we easily go through two bunches in two weeks. There were actually three different lettuces - iceberg, red leaf, and another tender one like red leaf but not red. We're going to grill up some chicken in Penzeys spice mix and have grilled chicken salad for dinner the next three nights.

Monday, January 10, 2011

Targeting Rep. Gabrielle Giffords

We've been hearing a lot about how Palin's political machinery is responsible, in some way, for the attempted assassination of Rep. Giffords and the murder of 9 people on Jan. 8, 2011. The idea is that conservatives have consistently used a rhetoric of "targeting" -- a visual and linguistic rhetoric -- when speaking about defeating Giffords and others in the elections. Others have responded -- I believe it was an article in the New York Times -- that liberals frequently use this same rhetoric to talk about defeating conservatives. The point then is that the rhetoric of targeting is not simply a partisan phenomenon, but rather marks contemporary rhetoric in general, especially since 9/11.

This is argued in Samuel Weber's 2005 book Targets of Opportunity: On the Militarization of Thinking (you can read it on Google). Part of his point is that targeting is not "originally" a military phenomenon, but rather has to do with a more general attempt to respond to a singular event by focusing on it and extracting it from its context so that the event can be localized and hence controlled. Targeting therefore always assumes that it is possible to control the uncontrollable, simply by placing it in real or metaphorical cross hairs. It is in fact the very essence of what it means to act as an autonomous subject and, one might add, as a political subject. As if to say: I, the sole agent of my actions, will execute this precise act in a controlled manner, in order to produce a controlled effect. And to a certain extent, that's exactly what targeting does. Weber: "Targeting thus constitutes the condition of all execution, the execution of acts no less than that of judgments and sentences, such as the death-penalty. Every such execution, as targeting, is potentially and tendentially lethal, for by taking aim at its object, it isolates that object from its relation to its surroundings, removing everything that might distract its aim from the place it seeks to secure: that is, to occupy and to appropriate" (105).

The problem, of course, is that targeting rarely hits only that which one believes one is targeting. Collateral damage always takes place, that is, things are damaged that only happened to be sitting nearby, collaterally. And this means, in turn, that targeting rarely targets in a way that is fully controllable by an autonomous and fully intentional agent or executor. If collateral damage can happen, if it is always a risk, then this means that collateral damage is not simply accidental but rather remains as an essential part of any act of targeting: to target, to isolate an object from its surroundings, is always potentially to hit a non-target (something surrounding the target, something collateral).

And this is perhaps the generalized phenomenon that we've been witnessing in the last few days, perhaps the last few years: an attempt to control politics through targeting, which inevitably leads to collateral damage, what Sheriff Clarence Dupnik called "consequences." Palin et. al. targeted Giffords politically, but this act of targeting went beyond their intentions and ended up hitting her physically. The "lone gunman" Loughner targeted Giffords physically, but ended up hitting others as well. This is not an accident; this is what happens when people are targeted.

This problem of targeting also gets to the question of whether this act can be called "political." On the one hand, we can (and should) be indignant about the fact that the American media assumes that the assassination of a politician in Pakistan is clearly political (even though the assailant is clearly deranged) while the media here routinely denies the political nature of the same type of act that takes place in the United States of America. On the other hand, the problem of targeting shows us that this act has always been political, since this attempted assassination is infected by (though not necessarily produced by) the political targeting that was happening in "mere" rhetoric.

I therefore put "lone gunman" in quotes, because Loughner was not alone when he targeted Giffords. While it was certainly only his eye that was focusing on the U.S. Representative in that moment, the cross hairs had already been placed there by others, and will be placed there by others in the future as this case gets told and retold in the media and in the courts. At this point, to focus on the attempted assassination of Rep. Giffords is to target Giffords, and the question now becomes an ethical one as well as a political one: what does it mean to target Giffords now, after she has been the target of so many others?

Grandma's 90th Birthday


I'm a little out of practice, but I couldn't let my grandmother's 90th birthday go by without a cake.


I found this cake in an old (1986) Wilton cake decorating book. It was supposed to be made with a 3D Christmas tree pan, but that pan is discontinued. I found an egg pan, which was basically the right shape (and will hopefully make a good Mukmuk cake for a certain little guy's first birthday.) I think it worked well, but the egg pan is intented to make a sideways egg, not an upright egg, so there is lots of frosting and sticks holding the cake together. The beak and hat are ice cream cones with royal frosting.


The cake survived the drive to the restaurant!


The restaurant served the cake with flaming wings. It turned out well.


Posted by Picasa

Click here to see the rest of this post...

Thursday, January 06, 2011

CSA Basket 20


Yes, I skipped my post for CSA Basket 19. But I did get said basket and it was yummy. This week the basket contained:
Kale, Broccoli, Chard, Tomato, Parsley, Lettuce, Carrots, Fennel, Kohlrabi, Valencia Oranges, Apples, Cara Cara Oranges, Pears, Potatoes, Onions, and Garlic. I traded the parsley for more kale, since the wee bairn eats pureed kale like it's going out of style. We got at least two heads of lettuce. Guess these are the salad days. I think I might use the fennel, apple, and carrot to make Martha Stewart's Carrot, Apple, and Fennel Slaw.

Click here to see the rest of this post...

Tuesday, January 04, 2011

New Year, New Adventures

Last year, you may recall, I embarked upon two parallel journeys. First, I made a cupcake every month from Martha Stewart's Cupcakes: 175 Inspired Ideas for Everyone's Favorite Treat, which was a gift, along with an adorable cupcake making kit, from my dear friend Leah. Second, I made a cookie every month from The Ultimate Chocolate Cookie Book: From Chocolate Melties to Whoopie Pies, Chocolate Biscotti to Black and Whites, with Dozens of Chocolate Chip Cookies and Hundreds More by Bruce Weinstein and Mark Scarbrough, which was a gift from co-blogger Rebecca. Two dozen baked goods later, here we are.

A new year, a new pair of cooking adventures coming to you every month. I feel like the structure and deadline of the "of the month" projects kept me on the blog and happily in the kitchen. They also seemed to be relatively popular with our readers. So I've come up with two new food-related "of the month" blog projects (blogects?) for 2011.

First, I have long been harboring a fantasy of becoming an artisanal cheesemaker. In 2010 I read Animal, Vegetable, Miracle: A Year of Food Life by Barbara Kingsolver in which she describes attending a cheesemaking class with Ricki Carroll. For Hanukkah/Christmas/Solstice/Kwanzaa/New Year 2010, co-blogger Rebecca gave me Ricki's Gourmet Home Dairy Kit. The description of said kit states:

This kit is for novice cheesemakers and success is guaranteed!! With it, you will be able to make 12 varieties of soft fresh cheeses and other dairy treats.
How many did you say? Was that 12? Like the perfect number if you were planning to make one every month? How very convenient. Dairy Product of the Month didn't have quite the right ring. After much brain storming (credit really goes to my friend April who came up with it over lunch at LACMA), we've settled on Au Lait du Mois. I am hoping co-blogger Rebecca will join me on this intrepid journey, starting this month with yogurt. If you'd like to play along at home, get thee to cheesemaking.com and order a Gourmet Home Dairy Kit of your very own.

For my next trick, I was looking for a food item we eat already but not well. While the cupcakes and cookies were great last year, I think they did some serious damage to our collective waistlines. Rather than do an "of the month" of a sometimes food, I thought I would work on improving something we would eat regardless whether I was doing this whole "of the month" thing. One of the few foods we regularly order out or open a frozen box to prepare is pizza. Mark Bittman has made it clear that pizza dough is too easy not to make yourself. But I have never made pizza dough from scratch. I haven't even had much success with the dough in a bag you can buy at Trader Joe's. I've even messed up precooked Boboli crusts before. So I have a lot to learn about this whole pizza making process. Co-blogger Rebecca kindly gave me a Lodge Pro Logic Cast-Iron 14-Inch Pizza Pan for Hanukkah/Christmas/Solstice/Kwanzaa/New Year 2010. Is it a bad sign that I didn't even know such things existed? As I have fallen in crush with Mark Scarbrough, I've purchased Pizza: Grill It, Bake It, Love It! by Bruce Weinstein and Mark Scarbrough. I don't know if I'll be sticking to it exclusively, like I did the two cookbooks last year, but it will certainly feature prominently in my process. Following the foreign language theme, I'm calling this venture Pizza del Mese. From what I can glean, pizza baking involves extremely high oven temperatures, so I think this should provide lots of fodder for my new writing genre "adventure cooking at home."

P.S. If you actually know French or Italian and feel my translations are off, PLEASE post a comment with your alternative translations of "Milk Product of the Month" in French or "Pizza of the Month" in Italian. Thank you!