Thursday, November 25, 2010

November's Cupcake of the Month: Marshmallow Turkey Cupcakes


As the flames licked the underside of my kitchen cabinets I thought, "This is going to be the most exciting Cupcake of the Month post I have ever written."


The One-Bowl Chocolate Cupcakes which form the bodies of the turkeys are the chocolate equivalent of October's Cupcake of the Month: Yellow Buttermilk Cupcakes. They baked up with beautiful, even, dome tops. They aren't so amazing that you'd eat them without frosting. They're pretty much like a store bought box chocolate cake mix, which isn't a bad thing. I'll probably end up making these cupcakes again and again because they're a safe bet especially for younger pallets.

The assembly instructions state, "Press 5 gummy fish into each cupcake to make tail feathers." This is a lie. Gummy fish pressed into a cupcake will fall over almost instantly. Five gummy fish pressed into one edge of a cupcake will rip that cupcake apart as they fall over almost instantly. The only way to get a gummy fish to stand up on a cupcake and not destroy it is to carefully insert a toothpick into the tail of the gummy fish as shown below.

The full feathered turkeys are pretty huge and constitute a choking hazard. Only Martha Stewart would decorate a cupcake in a way that primarily appeals to an age group that is most likely to suffer injuries from the toothpicks necessary to hold said decorations in place. I left the tail feathers off half of my turkeys, making turkey hens. I also ran out of turkey heads (see discussion of turkey heads below), so the remainder just got chocolate sprinkles.

The recipe in the book and the title of this post uses marshmallows. More specifically, you're supposed to use Kraft Jet-Puffed Toasted Coconut Marshmallows to make the turkey heads. I am more than capable of tracking down food-quality, organic lavender, but I'll be damned if I can find Kraft Jet-Puffed Toasted Coconut Marshmallows. I tried dusting regular marshmallows with cocoa powder, but they were way too big relative to the size of the cupcake. I feel like the ideal proportions for a turkey are a funny little head on a great big bird.

Moreover, the original instructions indicate that the gummy fish head beak could be attached simply by pushing it into the marshmallow. I tried that and the gummy fish head beaks did not stay attached to the marshmallow heads. The only way I could affix the gummy fish head beaks to the marshmallow heads was to score the marshmallow where the beak was to be applied, dip the gummy fish head beak into melted cooled chocolate, and then stick the chocolate coated gummy fish head beak onto the scored area of the marshmallow head. And even after all that, the marshmallow head was just disproportionately huge relative to the cupcake body. So I substituted the elusive Kraft Jet-Puffed Toasted Coconut Marshmallows with Chocolate Peanut Butter Pretzel Nuggets from the bulk candy section of Henry's. I attached the gummy fish head beaks by dipping them in melted cooled chocolate and resting them on the Chocolate Peanut Butter Pretzel Nuggets. I had to balance the candies beak-up to cool, but that was the least of my troubles.

Which gets us back to the fire. Turkey feathers. 12 oz. (4 C) sweetened shredded coconut, . . lightly toasted. Now, I knew that toasting coconut was not something I should try while watching my baby by myself. I knew that. In fact, I planned my day around that very fact. A friend was coming over to watch my baby while I did some tasks around the house and errands. On my list of tasks: toast coconut. And I did. I spread a thin layer of coconut over a cookie sheet and popped it under the broiler, started talking to my friend, and then smelled smoke. "Fire!" I hear you cry. But no. Just charred coconut. So I scrapped that batch and tried again. This time cracking the oven door and ignoring my friend while I watched the coconut like a hawk. As soon as it showed the slightest sign of toastedness I took it out of the oven. The area directly under the broiler was beautifully golden. But when I poured it into my clear bowl, it all looked too white still. But my friend wasn't feeling well, so I bid her adieu and put my coconut away . . . .

Until later that evening, when I thought, "That coconut is just not toasted enough." The baby seemed contented playing on the kitchen floor while I was cleaning up after dinner. So I thought, "I'll just spread some on the toaster oven tray and toast it a little more to see how it turns out." Not heating up the whole oven, so not endangering my baby, right? RIGHT?!? As I depressed the broken toaster lever which never ever pops up like normal toaster levers, I thought "This is the sort of thing that could burn the house to the ground if I forget about it." Then I proceeded to strain raw milk and boil it to make yogurt.

Yes, I make my own yogurt from raw milk that my friend brings me when she's not making cheese with it. Yes, she has a cow share. She milks Guinevere, that's the cow, every Tuesday evening and every other Friday evening. I know, isn't that cool? Don't you want to become an artisanal cheesemaker with your own goat farm? Me too! Yogurt is so easy. It's easy to sort of check on it every once in awhile while you're doing other things, like, say, watching Tina Fey: The Kennedy Center Mark Twain Prize on PBS. Don't you just love Tina Fey?

And that's when I smelled smoke. "Damn!" I thought as I put the baby in the pack 'n' play, flung open the kitchen door, and saw the thick, thick smoke, "I knew I'd forget this coconut in the toaster oven. I bet the coconut is totally charred." Then I turned and saw the toaster oven . . . on fire. Not the coconut inside the toaster oven. No. The entire toaster oven in flames. Knowing this could go from bad to worse quickly, I pulled the power cord out of the outlet and opened the cabinet where the fire extinguisher is . . . still in its unopened box.

Cut to close up of fire extinguisher box.

Cut to close up of my face completely devoid of knowledge of how to operate a fire extinguisher.

Cut to close up of flames licking the bottom of my kitchen cabinet.

Cut to medium shot of me slamming the cabinet shut and running for the big box o' baking soda.

Baking soda saved my life. Or at least my kitchen cabinets. It put out the flames sufficiently that I could use potholders to get the toaster oven closer to the sink. Then I used the detachable faucet sprayer of my fantastic Grohe faucet to spray the inside of the toaster that I couldn't reach with the baking soda . . . at which point the glass front and handle of the toaster oven exploded. It was a minor explosion and without spreading flames, so I was undeterred. Once the sooty water started spreading over the counter and onto the floor I decided the risk of water damage had become equal to or greater than the risk that the toaster would flame up again, so I put the toaster in the sink and continued running water over it while I used all of my dish towels to stem the tide of sooty water. Once I was sure the fire was out (because the toaster was submerged in my sink) and the flood waters were receding, I listened for the cries of my baby. But there were no cries. WTF? I go out to the living room and there she is, giggling away at Tina Fey.

So this Thanksgiving I am especially thankful for Arm & Hammer Baking Soda, Grohe faucets, and Tina Fey.

You're a Turkey Cupcakes adapted from Martha Stewart's Cupcakes: 175 Inspired Ideas for Everyone's Favorite Treat

Technically, the recipe calls for 24 One-Bowl Chocolate Cupcakes, but the recipe for One-Bowl Chocolate Cupcakes only yields 18. I wasn't about to multiply the One-Bowl Chocolate Cupcake recipe by, what, 1 1/3 to get 24 cupcakes. My flock is only 18 turkeys.

Ingredients:

  • 18 One-Bowl Chocolate Cupcakes (see recipe below)
  • Swiss Meringue Buttercream (see recipe in June's Cupcake of the Month: Flock of Sheep Cupcakes)
  • 5 T semi-sweet chocolate chip, melted and cooled
  • 18 turkey-head shaped chocolate candies, such as Chocolate Peanut Butter Pretzel Nuggets from the bulk candy section of Henry's
  • 1 lb. gummy fish
  • Toothpicks
  • 12 oz. (4 C) sweetened shredded coconut, LIGHTLY toasted


Procedure:
1. Using a flexible spatula, fold melted and cooled chocolate into buttercream. Use an offset spatula to spread buttercream over cupcakes in a smooth layer.

2. Cut the heads off of 18 orange gummy fish. Attached the gummy fish head beaks by dipping them in melted cooled chocolate and resting them on the Chocolate Peanut Butter Pretzel Nuggets. Balance the candies beak-up to cool. Press candy heads onto cupcakes.

3. Gently insert toothpicks into the tails of sixty gummy fish. Press 5 gummy fish into each cupcake to make tail feathers. Sprinkle LIGHTLY toasted coconut over cupcakes to cover completely. Decorated cupcakes can be stored up to 1 day at room temperature in airtight containers.

One-Bowl Chocolate Cupcakes adapted from Martha Stewart's Cupcakes: 175 Inspired Ideas for Everyone's Favorite Treat

Ingredients
  • 1 1/2 C all-purpose flour
  • 3/4 C unsweetened Dutch-process cocoa powder
  • 1 1/2 C sugar
  • 1 1/2 t baking soda
  • 3/4 t baking powder
  • 3/4 t salt
  • 2 large eggs
  • 3/4 C buttermilk
  • 3 T vegetable oil
  • 1 t pure vanilla extract
  • 3/4 C warm water

Procedure
1. Preheat oven to 350. Line standard muffin tins with paper liners. With an electric mixer on medium speed, whisk together flour, cocoa, sugar, baking soda, baking powder, and salt. Reduce speed to low. Add eggs, buttermilk, oil, vanilla, and water; beat until smooth and combined, scraping down sides of bowl as needed.

2. Divide batter evenly among lined cups, filling each about two-thirds full. Bake, rotating tins halfway through, until a cake tester inserted in centers comes out clean, about 20 minutes. Transfer tins to wire racks to cool 10 minutes. Turn out cupcakes onto racks and let cool completely. Cupcakes can be stored overnight at room temperature, or frozen up to 2 months in airtight containers.

Previous Cupcakes of the Month:
January's Cupcake of the Month: Streusel Cupcakes
February's Cupcake of the Month: Martha's Meyer Lemon Cupcakes
March's Cupcake of the Month: Flourless Chocolate Cupcakes
April's Cupcake of the Month: Tres Leches Cupcakes
May's Cupcake of the Month: Strawberry Cupcakes
June's Cupcake of the Month: Flock of Sheep Cupcakes
July's Cupcake of the Month: Lavender-Iced Brownie Cupcakes
August's Cupcake of the Month: Cookies and Cream Cheesecakes
September's Cupcake of the Month: Devil's Food Cupcakes
October's Cupcake of the Month: Yellow Buttermilk Cupcakes

Click here to see the rest of this post...

Friday, November 19, 2010

CSA Basket 17


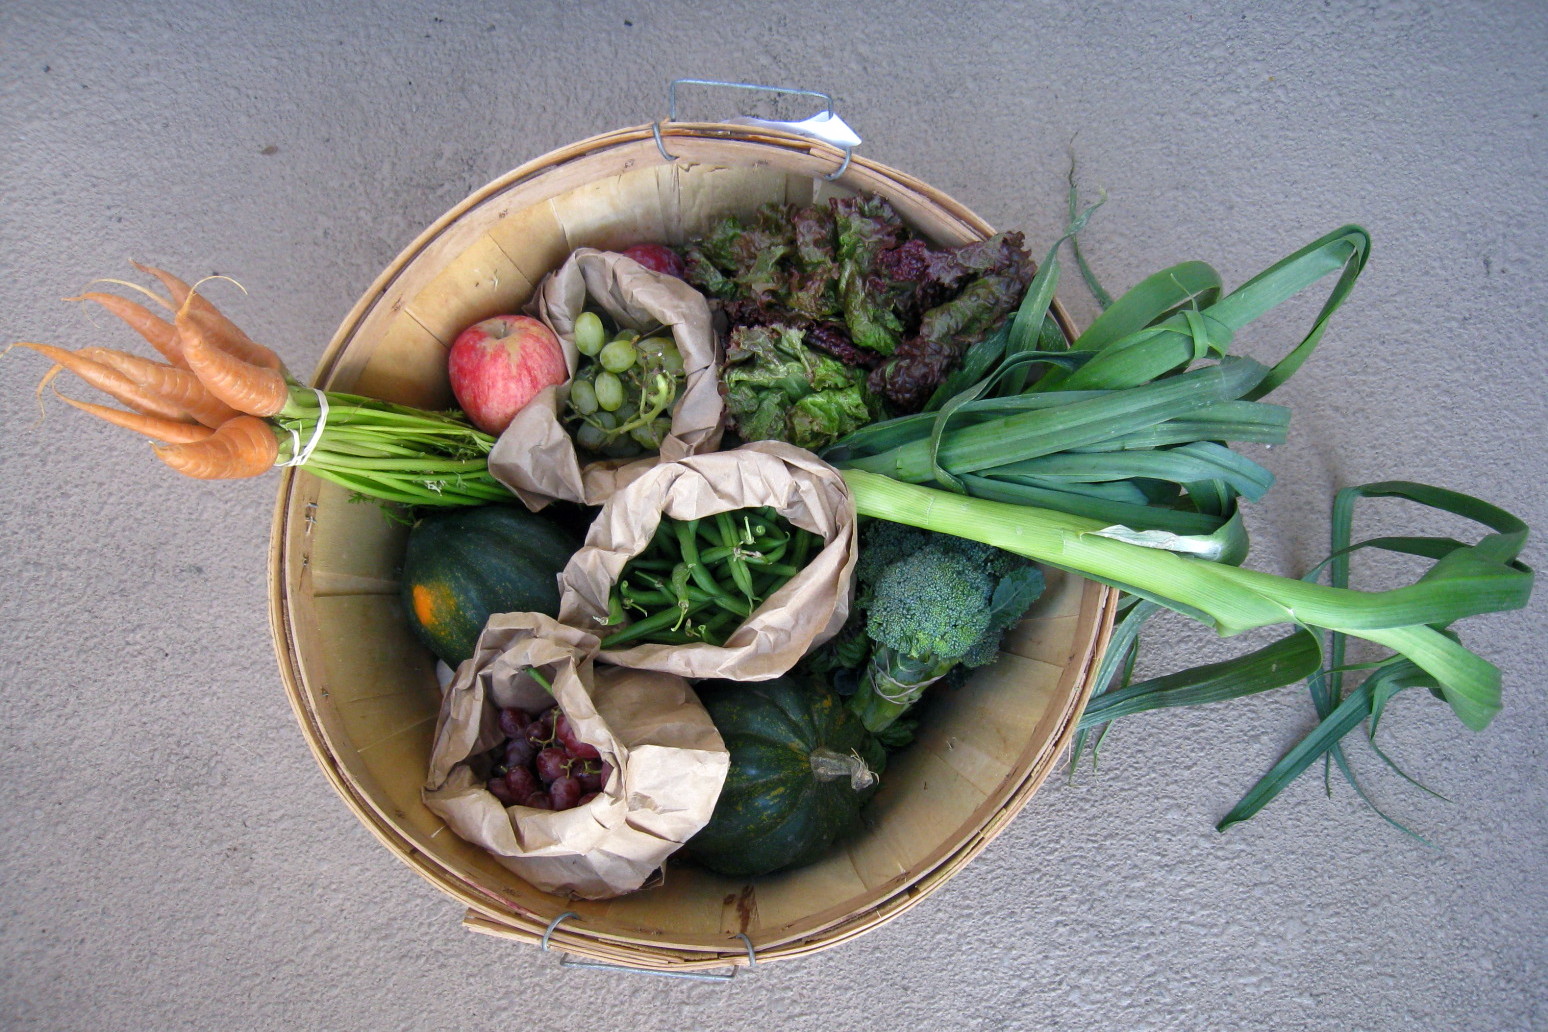
This week's basket contained: Lettuce (red leaf and romaine), Broccoli, Chard, Basil, Green Beans, Parsley, Eggplant, Winter Squash, Carrots, Cucumbers, Beets, Apples, Grapes, Celery, Herb Mix (sage, rosemary, and thyme), Yam, Potatoes, Onion, and Grapefruit.

I traded the chard, cucumber, beets, apples, and grapefruit, for a bunch more eggplants, green beans, and grapes. Broccoli, green beans, eggplant, winter squash, carrots, grapes, yam, and potatoes are all going to be baby food. I've got a ton of potatoes and some frozen dark greens, so I think I'm going to make some of Mark Bittman's Green Mashed Potatoes. Basil is going to be pesto.

Click here to see the rest of this post...

Wednesday, November 10, 2010

October's Cupcake of the Month: Yellow Buttermilk Cupcakes


I know, I know, it hasn't been October for awhile now. But in addition to having an overwhelming October I have a good excuse: I have two occasions for which I need to make cupcakes in November. This occasion: my birthday. In the interest of sanity, I kept it simple by choosing Yellow Buttermilk Cupcakes from Martha Stewart's Cupcakes: 175 Inspired Ideas for Everyone's Favorite Treat.

Much like September's Cupcake of the Month: Devil's Food Cupcakes, the cake part of the cupcakes baked up with beautiful, even, dome tops. Unlike the Devil's Food Cupcakes, the Yellow Buttermilk Cupcakes aren't so amazing that you'd eat them without frosting, but that may be an expression of my bias towards chocolate baked goods. The buttermilk flavor isn't noticeable. They're pretty much like a store bought box yellow cake mix. This isn't a bad thing. People spend hours of their lives trying to perfect the homemade yellow cake that tastes like a box cake. But after nine months of interesting cupcake flavors, I'm jaded. Like the preamble to this recipe states, I'll probably end up making these cupcakes again and again because they're a safe bet especially for younger pallets. Also, they'd be a great base for frosting experimentation as they don't impose their flavor too strongly.

The frosting that Martha Stewart's Cupcakes pairs with the Yellow Buttermilk Cupcakes, Fluffy Vanilla Frosting, is as basic as you can get: butter, confectioner's sugar, and vanilla extract. That said, my cake decorating guru/coblogger Rebecca uses something like this instead of Swiss Meringue Buttercream as her go-to decorating frosting as it takes color well and holds up to intense piping. It serves as an excellent base for sprinkles, as shown above. Much like the cupcake, the frosting isn't anything to write home about, but it will certainly not offend a wide range of pallets.

Two quantity caveats: First, the cupcake recipe says it yields 36, but I only squeaked by with 30. Second, the frosting recipe is probably insufficient to frost 36 cupcakes. I'd double or maybe even triple it, just to be safe. I can't tell you for sure how many cupcakes the frosting recipe can cover because our dogs ate most of the cupcakes as they were cooling on the dining room table . . . but I can tell you the frosting recipe will amply cover five cupcakes with plenty left over.

Yellow Buttermilk Cupcakes adapted from Martha Stewart's Cupcakes: 175 Inspired Ideas for Everyone's Favorite Treat

Ingredients

  • 3 C cake flour (not self-rising)
  • 1 1/2 C all-purpose flour
  • 3/4 t baking soda
  • 2 1/4 t baking powder
  • 1 1/2 t salt
  • 1 C plus 2 T (2 1/4 sticks) unsalted butter, room temperature
  • 2 1/4 C sugar
  • 5 large eggs plus 3 egg yolks, room temperature
  • 2 C buttermilk, room temperature
  • 2 t pure vanilla extract
  • Fluffy Vanilla Frosting (recipe below)
  • Candy sprinkles for decorating (optional)

Procedure
1. Preheat oven to 350. Line standard muffin tins with paper liners. Sift together both flours, baking soda, baking powder, and salt.

2. With an electric mixer on medium-high speed, cream butter and sugar until pale and fluffy. Reduce speed to medium. Add whole eggs, one at a time, beating until each is incorporated, scraping down sides of bowl as needed. Add yolks, and beet until thoroughly combined. Reduce speed to low. Add flour mixture in three batches, alternating with two additions of buttermilk, and beating until combined after each. Beat in vanilla.

3. Divide batter evenly among lined cups, filling each three-quarters full. Bake, rotating tins halfway through, about 20 minutes. Transfer tins to wire racks to cool 10 minutes. Turn out cupcakes onto rack and let cool completely. Cupcakes can be stored overnight at room temperature or frozen up to 2 months in airtight containers.

4. To finish, use a small offset spatula to spread cupcakes with frosting. Refrigerate up to 3 days in airtight containers. Bring to room temperature and decorate with sprinkles before serving.

Fluffy Vanilla Frosting adapted from Martha Stewart's Cupcakes: 175 Inspired Ideas for Everyone's Favorite Treat

Ingredients
  • 1 1/2 C (3 sticks) unsalted butter, room temperature
  • 1 lb. (4 C) confectioners' sugar, sifted
  • 1/2 t pure vanilla extract

Procedure
1. With an electric mixer, beat butter on medium-high speed until pale and creamy, about 2 minutes.

2. Reduce speed to medium. Add the confectioners' sugar, 1/2 C at a time, beating well after each addition and scraping down sides of bowl as needed; after every two additions, raise speed to high and beat 10 seconds to aerate frosting, then return to medium. This process should take about 5 minutes. Frosting will be very pale and fluffy.

3. Add vanilla and beat until frosting is smooth. If not using immediately, frosting can be refrigerated up to 10 days in an airtight container. Before using, bring to room temperature, and beat on low speed until smooth again, about 5 minutes.

Previous Cupcakes of the Month:
January's Cupcake of the Month: Streusel Cupcakes
February's Cupcake of the Month: Martha's Meyer Lemon Cupcakes
March's Cupcake of the Month: Flourless Chocolate Cupcakes
April's Cupcake of the Month: Tres Leches Cupcakes
May's Cupcake of the Month: Strawberry Cupcakes
June's Cupcake of the Month: Flock of Sheep Cupcakes
July's Cupcake of the Month: Lavender-Iced Brownie Cupcakes
August's Cupcake of the Month: Cookies and Cream Cheesecakes
September's Cupcake of the Month: Devil's Food Cupcakes

Click here to see the rest of this post...

Saturday, November 06, 2010

Meta T-shirt


Wrap your brain around this. On NPR's Planet Money Tuesday Podcast they're doing a series about making a Planet Money t-shirt. They've settled on a design - a QR code containing the story of making the t-shirt - and a color palette - green and gray. Their first installment "explain[s] why ripping off other people's fashion ideas is a good — and, for the moment, perfectly legal — strategy for us to pursue." So what is this t-shirt? If you scan the QR code you will get the link to the Planet Money Tuesday Podcast about stealing other people's fashion ideas. Get it?

I just used that handy free QR Code Generator, plugged in the URL for the podcast, took the resulting .png file into GIMP and changed the black to either gray or green, and then popped it into Zazzle.

Definitely check out the podcast and the links on the page for the podcast. Lots of cool information about the intellectual property issues surrounding fashion.

Click here to see the rest of this post...

Product Review: Ecosmart LED Lightbulbs


I have been struggling with the appropriate light bulbs for the recessed lights in our kitchen since we moved in over two years ago. The previous owners had traditional flood lights installed which heated up the kitchen like McNuggets under a heat lamp. So I switched to CFLs, as I am want to do. But there were two problems. First, the kitchen lights are on a dimmer switch and CFLs, at least all those with which I am familiar, are not dimmable (they just switch from on to off and when the dimmer switch isn't totally on, they buzz at the resonant frequency of my frontal lobe). Second, with six CFLs, the kitchen was as bright as the surface of the sun. So I had put off replacing light bulbs in there until we were literally down to one functioning light bulb. I ventured to Home Depot this week to see if I could find a solution to my lighting conundrum. And I think I did . . . LED light bulbs.

The brand is Ecosmart, which I'm 98% sure is Home Depot's brand. They're made in the U.S.A., which is just lovely. I bought three different bulbs, each with a different watt equivalency: 40, 60, and 75. They look pretty different too. The 40 watt equivalent LED bulb, pictured above, looks the most like a standard light bulb. Actually, it looks more like those bulbs that are supposed to go in bathroom vanity lights. The other two look like medium and large halogen bulbs. But all three fit in my standard sized recessed fixtures.

I thought that the 40 watt equivalent might be too dim for the kitchen. I was wrong. When the dimmer is set to maximum the kitchen is as bright as the surface of the sun, which is totally cool when you're trying to do delicate cooking procedures or cleaning . . . which this totally makes you realize you need to do a lot more frequently and vigorously. I'm guessing they would also be excellent at staving off Seasonal Affective Disorder. But unlike the flood lights, the room temperature does not seem to be affected by the blazing light. More importantly, you can actually use the dimmer switch to make the light significantly less intense, which is nice for when you're just working on your morning bowl of cereal. I am very happy with their dimmability thusfar.

According to the box, these give off light at about 3000K (correlated color temperature), so they right between warm light and bright white light. They certainly don't seem as blue as fluorescents, and I don't think they're as blue as CFLs. They're not as yellow as conventional bulbs, but I kinda like the slightly more daylight accurate nature of non-conventional bulbs anyway. That way your food that looks great in the kitchen still looks great at the backyard barbecue.

Another reason I'm interested in moving toward LEDs from CFLs is I'm kinda wigged out by the mercury in CFLs. LEDs don't contain mercury. So I'm definitely thinking I might change the light bulbs most in danger of being broken, like those in floor lamps, to LEDs from CFLs.

One ginormous caveat: these LED light bulbs are expensive to purchase. The 40 watt equivalent LED bulbs cost $29.97 each. The 60 watt equivalent LED bulbs cost $39.97. The 75 watt equivalent LED bulbs cost $44.97. That said, they claim 50,000 hour lifespans. Based on the manufacturer's calculations the 60 watt equivalent bulb uses $75.00 of electricity over its lifespan while a 60W halogen bulb uses $360 over the sam period resulting in a savings of $285.00 per bulb. I believe that calculation is solely based on kilowatt hour usage, so it doesn't include the cost of replacing the comparable light bulb multiple times. For example, over the 50,000 hour lifespan of this LED light, you would have to replace a CFL at least 3 times. So I think if we ever move out of this house, we're taking these light bulbs with us.

Another caveat: these LED light bulbs interfere with radio communications. We don't get great radio reception here to begin with, but now, when the LED lights are on in the kitchen, the radios throughout the house get even more static. They do not seem to interfere with our baby monitor, cordless phones, or wi-fi.

A little more technical data for you:
The 40 watt equivalent LED bulbs output 450 lumens and use 8 watts of energy. So their lumens per watt is 56, which is apparently some wonderful measure of luminous efficiency at least as good as a CFL. The luminous efficiency of the 75 watt equivalent LED bulb is 47, so if you don't actually need to perform brain surgery, you should probably stick with the 40 watt equivalent LED bulb. The color accuracy for all the LED bulbs I looked at on the Color Rendering Index is 85, which seems to be good as that's out of 100.

Long story short: other than the hefty upfront cost and the static on my radio, I love my new LED light bulbs.

Click here to see the rest of this post...

Friday, November 05, 2010

CSA Basket 16


This week's basket contained: Chard, Winter Squash, Summer Squash, Cucumber, Eggplant, Kale, Parsley, Leeks, Beets, Carrots, Basil, Broccoli, Green Beans, Plums, Red Leaf Lettuce, Apples, Grapes, and Valencia Oranges. I traded the chard, summer squash, cucumbers, and beets for more winter squash, more leeks, a head of garlic, and a bag of grapes.

The winter squash, eggplant, carrots, broccoli, green beans, plums, and grapes are all baby food. The kale is going to get sauteed with some garlic and thrown onto a pizza. The leeks are going to be Alton Brown's leek potato soup. The basil will be pesto.

Click here to see the rest of this post...

Sunday, October 31, 2010

Jack-o'-lantern


Friday, October 30th at 9:00 p.m., I put the finishing touches on the jack-o'-lantern I carved from last week's CSA basket pumpkin.
Carving jack-o'-lanterns with Mom, Bob, and Rebecca back in 2008 made me realize that pumpkin carving is a lot more fun than I thought it was, especially with the right tools. This one was super easy. Maybe next year I'll have time for something a bit more challenging.

October's Cookie of the Month: Pumpkin Chocolate Chip Cookies


My independent taste tester loves pumpkin baked goods, especially with chocolate chips, so this wasn't exactly what you'd call a tough sell. He loved them, especially their cakeyness. I, on the other hand, am not a big fan of pumpkin baked goods, chocolate chips or no. But I found the pumpkin to be quite subtle in these cookies, much like the banana in April's Cookie of the Month: Banana Chocolate Chip Cookies. These taste even better the next day. My second batch spent a few too many minutes in the oven, and they were still super soft and yummy the next day.


Pumpkin Chocolate Chip Cookies adapted from The Ultimate Chocolate Cookie Book: From Chocolate Melties to Whoopie Pies, Chocolate Biscotti to Black and Whites, with Dozens of Chocolate Chip Cookies and Hundreds More by Bruce Weinstein and Mark Scarbrough

Ingredients


  • 2 C plus 2 T all-purpose flour
  • 1 t baking soda
  • 1/2 t ground cinnamon
  • 1/2 t grated nutmeg
  • 1/2 t salt
  • 8 T (1 stick) unsalted butter, cool, cut into small pieces
  • 1/2 C granulated sugar
  • 1 C packed brown sugar
  • 1 large egg, room temperature
  • 1 large egg white, room temperature
  • 1/2 C solid-packed canned pumpkin (do not use canned pumpkin pie filling)
  • 2 t vanilla extract
  • 3 C Ghiradelli 60% Cacao chips

Procedure

1. Preheat oven to 350 degrees. Sift the flour, baking soda, cinnamon, nutmeg, and salt into a medium bowl.

2. Soften the butter in a large bowl, using an electric mixer at medium speed, about 1 minute. Add both kinds of sugar and continue beating until the mixture is light and airy, but still somewhat grainy, about 1 minute. Scrape down the sides of the bowl, beat in the egg, then the egg white, then the canned pumpkin, and finally the vanilla. Don't worry if the dough looks slightly curdled at this point.

3. Add the prepared flour mixture and beat at low speed just until soft and light, like traditional chocolate chip cookie dough, not sticky. Stir in the chocolate chips, just until evenly distributed.

4. Drop by rounded tablespoonfuls onto two large baking sheets lined with silicone mats, spacing about 2 inches apart. Bake for 10 minutes, then rotate the baking sheets top to bottom and back to front. Bake for another 8 minutes, or until lightly browned and somewhat springy to the touch. Cool on the baking sheets for 5 minutes, then transfer to wire racks to cool completely. Cool the baking sheets for 5 minutes before baking further batches.

Previous Cookies of the Month:
January's Cookie of the Month: Soft Chocolate Chip Oatmeal Cookies
February's Cookie of the Month: Chocolate Cream Sandwich Cookies
March's Cookie of the Month: Classic Chocolate Chip Cookies
April's Cookie of the Month: Banana Chocolate Chip Cookies
May's Cookie of the Month: Butterscotch Chocolate Chip Cookies
June's Cookie of the Month: Honey Chocolate Chip Cookies
July's Cookie of the Month: Big Soft Chocolate Cookies
August's Cookie of the Month: Viennese Chocolate Pepper Cookies
September's Cookie of the Month: Potato Chip Chocolate Chip Cookies

Click here to see the rest of this post...

Tuesday, October 26, 2010

Fullerton Voting Guide?

If you're a Democrat or of a more generally liberal persuasion, voting in Orange County can seem a bit disheartening. I've put together what I can figure are the best of bad choices with links to other resources so you can make up your own mind. Seated in a conference room in Cal. State Fullerton's Pollack Library, awaiting the start of a talk “Public History, Public Trust: Remaking the Nixon Library” by Dr. Timothy Naftali, the Director of the Richard Nixon Presidential Library and Museum, and their Education Specialist, Mindy Farmer, at Cal State Fullerton on Thursday, October 21st, a handful of folks from the political science department discussed the upcoming election. The two big topics of conversation were the Fullerton city council and the judicial seats.

Regardless your position on the candidates and issues, the most important thing is that you vote. The registration deadline has passed in California, but if you're registered, you can vote. The Obamas are asking you to commit to vote and share that commitment through your social network so as to promote voting among your friends.

For the Democratic Party of Orange County's endorsements click here.

For City of Fullerton, Member, City Council, Full Term, I'm voting for Jesse LaTour. Of all the local candidates, I am most excited about LaTour. I met him at a dinner party. Lovely young man. As one of my friends said, "Well, he's sure not more of the same." I'm definitely not voting for Bruce Whitaker, as Red County loves him. I'm not voting for Barry Levinson because he seems like a loose cannon, and not in a fun, alternative way. Greg Sebourn is endorsed by scary conservatives.

For City of Fullerton, Member, City Council, Short Term, I'm voting for Anthony N. Fonte. According to the League of Women Voters, Roland Chi and Bruce Whitaker are both endorsed by Republicans. I liked what Fonte said about this post being non-partisan so he's not accepting any endorsements. I also like his idea to turn Coyote Hills into a park. Fullerton Stories has profiles of each of these candidates.


As far as the judicial races go, I'd like to offer as a caveat the words of a wise commentator on Red County.

It's a bad idea to vote against a judge or justice simply because you disagree with some of his or her rulings. We don't want the bench to be subject to the tyranny of the majority, which is what would happen if everyone did as you suggest. The judiciary needs to be independent of political pull, and we should be voting against judges only if they are plainly incompetent, guilty of some moral turpitude, or similar problem.

I don't know of any of the judges or justices who meet that standard. I think we should either vote in favor of all those on the November ballot, or refrain from voting in those races.
If one believes that judges should be appointed rather than elected does one best express that opinion by voting yes for all, voting no for all, or not voting in judicial races? If you decide to vote on a candidate-by-candidate basis, why not take the advice offered by one of the folks awaiting the Nixon library talk: vote the opposite of the guy from Red County. I'll save you the trouble (and the guilty conscience of generating ad revenue for Red County's website):
Vote No on Tani G. Cantil-Sakauye.
Vote Yes on Ming W. Chin.
Vote Yes on Carlos R. Moreno.
Vote Yes on Judith D. McConnell.
Vote Yes on Manuel A. Ramirez.
Vote Yes on Carol D. Codrington.
Vote Yes on David G. Sills.
Vote No on William W. Bedsworth.
Vote Yes on Eileen C. Moore.

For your propositions, scroll down to page nine in this PDF of the Fullerton Observer for a handy chart showing where the following groups stand: the Chamber of Commerce North OC, the League of Women Voters, the Green Party, the Republican Party, the Democratic Party, and the Sierra Club.


The links in the blurbs about the North Orange County Community College District Governing Board Members go to the non-partisan League of Women Voters candidate information for each contest. They're a quick read and might give you more of a clue on how to vote than I give you here. For North Orange County Community College District, Governing Board Member, Trustee Area 2 I'm voting for Barbara Dunsheath as she seems vastly more qualified to address the needs of community college students and faculty than her opponent. Also, Tim Keenan is endorsed by Ed Royce, the Republican U.S. Representative for our district.

For North Orange County Community College District, Governing Board Member, Trustee Area 3 I'm not super thrilled with either candidate. Brown seems more experienced but Barron seems to have his priorities in order.

I am similarly unenthused about the candidates for North Orange County Community College District, Governing Board Member, Trustee Area 4. Miller seems more experienced, but Allen seems to have her priorities in order.

For the Fullerton joint Union High School Governing Board Members, Buchi, Singer, and Hathaway seem vastly more experienced.

For Fullerton School District, Governing Board Member, I'm voting for Aaruni Thakur and Beverly Berryman. Meyer and Thompson are endorsed by Ed Royce, the Republican U.S. Representative for our district.

I saved the County of Orange County Supervisor 4th District for the end of this post since it's a choice between two Republicans neither of whom I'd be particularly thrilled about. But all things being equal, Shawn Nelson's only "issue" on his website seems to suggest he's anti-High Speed Rail. First, lame that it's the only issue. Second, high speed rail is going to be great for Orange County, so he's on the wrong side of his one issue. So that leaves me with Harry Sidhu, who at least recognizes the importance of more than one issue on his website . . . if that's not damning with faint praise I don't know what is.

Same problem with the County of Orange Treasurer-Tax Collector. Shari L. Freidenrich is endorsed by all the scary conservatives. Keith Rodenhuis doesn't have a link to his endorsements, which bodes poorly for his success, but he's also a Republican. He's worked as the deputy to the position he's running for, so eh, why not.

Click here to see the rest of this post...

Thursday, October 21, 2010

CSA Basket 15


This week's basket contained: Summer Squash, Winter Squash, Tomatoes, Beets, Eggplant, Jalapeno, Basil, Leeks, Broccoli, Kale, Purple Pepper, Apples, Valencia Oranges, Grapes, Celery, Red Butter Lettuce, Plums, Pumpkins, and Chard. I forgot to include the pumpkin in this picture. It's a good-sized carving pumpkin. Stay tuned for impending jack-o'-lantern. I traded in three summer squash and the beets for garlic, eggplant (baby LOVES eggplant), and tomatoes.

Saturday, October 09, 2010

CSA Basket 14


This week's basket contained: Carrots, Chard, Summer Squash, Winter Squash, Cucumber, Green Beans, Cilantro, Parsley, Eggplant, Jalapeno, Basil, Grapefruit, Apples, Pluots, Red Leaf and Red Butter Lettuce, Valencia Oranges, Grapes, and Nectarines. Please excuse the indoor picture. It was raining, which I find quite shocking . . . a sign I have officially been lulled into submission by the gorgeous climate of southern California.

I traded in the summer squash for more winter squash. The carrots, two of three winter squashes, green beans, eggplant, apples, and nectarines have all been made into baby food. Actually, we've advanced to the eating of small pieces of squishy fruit, so the nectarines aren't really processed into baby food so much as diced while feeding like the grapes. The carrots and squash, along with some store bought organic white potatoes, were diced and steamed for more self-feeding baby fun. The green beans, eggplant, and apples were all steamed and run through my trusty KitchenAid FVSFGA Fruit/Vegetable Strainer and Food Grinder for Stand Mixers.

The chard is probably going to be frozen for my go-to Black Bean Chilaquiles from Moosewood Restaurant Low-Fat Favorites: Flavorful Recipes for Healthful Meals. This tome falls open to page 164 because I make chilaquiles (pronounced: chee-lah-KEE-lays, though I have been known to refer to it as Shaquille O'Neal, which is still better than what I used to say back when I first got this cookbook in 1998 "chill-LAH-kway" . . . which reminds me of how this girl in my dorm in high school used to pronounce fajitas . . . which was not appetizing at all) every other week and it serves eight, so we probably eat it on average twice a week. The recipe calls for a bunch of steamed chard, but I've found that freezing it in water breaks down the cell walls sufficiently to make the chard layer nicely and it leaves more of the chard-y flavor in the dish. I used a similar trick to make stuffed cabbage. In fact, I've got a cabbage in my freezer awaiting that very fate.

The cilantro and basil shall become pesto, as usual.

I'm contemplating making Spicy Orange Salad, Moroccan Style, like I did starting with Basket 3 in May. We're kinda out of our tagine phase. So any suggestions for something North African to pair with the orange salad would be greatly appreciated.

I might make pickles with the cucumbers. I finally ate some bread and butter pickles dear Cousin Eartha made for Presidents Day. So good! If I could figure out how to make those, I would disparage this overload of cucumbers so much less.

Click here to see the rest of this post...

Friday, October 01, 2010

Furrday: OK GO Edition

No pictures of our own pooches this week. Just the following embedded YouTube video and a link to The Madeline Brand Show segment in which she interviewed Trish Sie, the amazing director and choreographer behind the latest OK Go video for their song "White Knuckles." [<--Try this link to view it on YouTube if the video below appears cut off - the pyramid of trash cans should be centered in the image.] You may recall OK Go is that band that had a YouTube hit with their video for "Here It Goes Again" in which the band performs on treadmills. This new video is like that: no CGI, single take oner, directed and choreographed by Sie (who is the sister of maybe the lead singer) . . . but it has the added bonus of not one, not two, but TWELVE real dogs performing along with the band.

Tuesday, September 28, 2010

September's Cupcake of the Month: Devil's Food Cupcakes


Recently I came to the startling realization that I have never made chocolate frosting of any kind. In the interest of embarking on a personal journey to learn about the wonders of chocolate frosting, this month I chose Devil's Food Cupcakes with Chocolate Ganache Frosting from Martha Stewart's Cupcakes: 175 Inspired Ideas for Everyone's Favorite Treat.
The cake part of the cupcakes are really fantastic: moist, yet light. Before I had a chance to make the frosting, we'd already eaten these without frosting for desert two nights in a row. And they baked up with beautiful, even, dome tops. My independent taste tester said, "Those cupcakes came out of the oven actually looking the correct shape for cupcakes. I don't think any of the others did." Which I'm pretty sure is true.

The book features five chocolate toppings: Chocolate Ganache Glaze (paired with six different recipes - possibly second only to Swiss Meringue Buttercream for topping dominance), Dark Chocolate Frosting (paired with five different cupcakes), a chocolate variation of Swiss Meringue Buttercream (paired exclusively with Monkey Cupcakes), a Chocolate-Sour Cream Frosting (paired exclusively with Graduation Day Cupcakes), and Chocolate Ganache Frosting (paired exclusively with this month's Devil's Food Cupcakes). The differences between Chocolate Ganache Glaze and Chocolate Ganache Frosting are the ratio of the three ingredients and the temperature at which each is applied. I've already lost too many hours of my life to Martha's Swiss Meringue Buttercream to bother with the chocolate variation, which just requires folding 4 1/2 oz. melted and cooled semisweet chocolate into the buttercream along with the vanilla extract. So I limited my survey of chocolate frosting to the Chocolate Ganache Frosting, Chocolate-Sour Cream Frosting, and Dark Chocolate Frosting. After trying to taste test these on three different cupcakes, I decided to take the slightly more diabetic friendly approach. As you can tell in the pictures above, I put a sampling of each frosting on top of these cupcakes. But the images below show each frosting flying solo.

The Dark Chocolate Frosting recipe is flawed. I followed it to the letter and ended up with chocolate soup. In one of the pictures in Martha Stewart's Cupcakes this frosting is piped. There's no way one could pipe the frosting the original recipe makes. I added three times the confectioner's sugar and it just barely made it spreadable, still not pipeable. Thickness aside, I got a kinda grainy consistency. This I won't blame on the recipe. The grains are definitely little bits of chocolate. I use cheapo bulk bin unsweetened Dutch-process cocoa powder. I didn't measure the water/cocoa powder sufficiently carefully. The water/cocoa powder mixture turned out very dry, unlike when I did basically the same procedure to make the cupcakes when it turned out very liquidy and smooth. I tried to solve the problem not by resolving the consistency of the water/cocoa powder mixture prior to adding it to the batter, but rather by beating the batter for a longer time. That said, if my water/cocoa powder mixture had been the same consistency for this frosting as it was for the cupcakes, the frosting would have been even more liquidy, so the recipe is still messed up. All that aside, this frosting tastes awesome. It's not too dark chocolate-y even though I used 73% cacao chocolate bars. Granted, some of that is due to the addition of so much confectioner's sugar. It is also glossy and pretty, which a lot of homemade chocolate frosting isn't.

The Chocolate Ganache Frosting is fantastic. Basically it's like a soft layer of chocolate on top of the cupcake. I made mine with extremely dark chocolate (the aforementioned 73% cacao chocolate bars), which makes it a bit grown up. But I bet you could use something closer to milk chocolate and make small children very happy with this decadent frosting. You might even be able to get it to just the right consistency for piping a big swirl on top of a cupcake. The tricky part is that as this cools in the fridge it gets more and more solid (though never entirely solid), so you have to use it immediately or figure out a way to warm it up to the consistency you want it. I just took it out of the fridge and warmed it in a bowl over a pot of simmering water until I could stir it to the right consistency. No problem. Like the Dark Chocolate Frosting, the Chocolate Ganache Frosting looks glossy and pretty. It's darker in color and flavor than the inaptly named Dark Chocolate Frosting.
The Chocolate-Sour Cream Frosting had the most frosting-like consistency of the three. Definitely pipe-able. I used the same suspect cocoa powder as in the Dark Chocolate Frosting and it worked out just fine with zero graininess. The downside is that it is VERY sour creamy. I used the same 73% cacao chocolate bars, which almost overwhelmed the other two. But even 73% cacao chocolate could not stand up to the mighty flavor of sour cream and cream cheese. Mind you, if you're cool with that and you want to frost a whole cake or pipe big florets on the top of some cupcakes, this one is the hands down winner. But I wonder if it's only used in one recipe in the book because the editors are put off by the flavor.
Above you can see photographic evidence of my chocolate curl fail atop, from left to right: Dark Chocolate Frosting, Chocolate Ganache Frosting, and Chocolate-Sour Cream Frosting. The recipe calls for a garnish of chocolate curls on top. The directions tell you to heat a block of good-quality chocolate in microwave for 5-second intervals, checking after each, until "just warm to the touch" before using a vegetable peeler to slice strips from the block. I tried to make a curl at room temperature, but it fell into a zillion slivers. Well, the baby was napping so I didn't want to risk waking her up with the microwave and the Santa Anas are blowing, so the thermometer in the shade on my porch said it was 107 degrees. I figured I'd bring out the block of chocolate to the porch with me while I took the other pictures of the cupcakes and it would be "just warm to the touch" by the time I was ready for my grand finale picture of the cupcakes with chocolate curls. First, the block of chocolate was not even warm to the touch before it started melting in my hand. Second, even once I succeeded in getting a curl off the block it immediately melted in the heat. I haven't mastered chocolate curls yet, but it's a big block of chocolate . . . I shall persevere.

Devil's Food Cupcakes adapted from Martha Stewart's Cupcakes: 175 Inspired Ideas for Everyone's Favorite Treat

Ingredients

  • 3/4 C unsweetened Dutch-process cocoa powder
  • 3/4 C hot water
  • 3 C all-purpose flour
  • 1 t baking soda
  • 1 t baking powder
  • 1 1/4 t salt
  • 1 1/2 C (3 sticks) unsalted butter
  • 2 1/4 C sugar
  • 4 large eggs, room temperature
  • 1 T plus 1 t pure vanilla extract
  • 1 C sour cream, room temperature
  • Chocolate Ganache Frosting (recipe below)
  • 1 block good quality chocolate (for chocolate curls)

Procedure
1. Preheat oven to 350. Line standard muffin tins with paper liners. Whisk together cocoa and hot water until smooth. In another bowl, sift together flour, baking soda, baking powder, and salt.

2. Melt butter with sugar in a saucepan over medium-low heat, stirring to combine. Remove from heat, and pour into a mixing bowl. With an electric mixer on medium-low speed, beat until mixture is cooled, 4 to 5 minutes. Add eggs one at a time beating until each is incorporated, scraping down sides of bowl as needed. Add vanilla, then cocoa mixture, and beat until combined. Reduce speed to low. Add flour mixture in two batches, alternating with the sour cream, and beating until just combined after each.

3. Divide batter evenly among lined cups, filling each three-quarters full. Bake, rotating tins halfway through, about 20 minutes. Transfer tins to wire racks to cool 15 minutes. Turn out cupcakes onto rack and let cool completely. Cupcakes can be stored overnight at room temperature or frozen up to 2 months in airtight containers.

4. Use a small offset spatula to spread cupcakes with frosting. Refrigerate up to 3 days in airtight containers. Bring to room temperature before garnishing with chocolate curls just before serving.

5. Heat block of good-quality chocolate in microwave for 5-second intervals, checking after each, until just warm to the touch; do not overheat. Using a vegetable peeler, slice strips from the block, starting from the far edge of the chocolate, moving the peeler toward you, right onto the cupcakes.

Chocolate Ganache Frosting adapted from Martha Stewart's Cupcakes: 175 Inspired Ideas for Everyone's Favorite Treat

Ingredients
  • 1 lb. good-quality bittersweet chocolate, finely chopped
  • 2 1/3 C heavy cream
  • 1/4 C corn syrup

Procedure
1. Place chocolate in a large heatproof bowl. Bring cream and corn syrup just to a simmer over medium-high heat; pour mixture over chocolate. Let stand, without stirring, until chocolate begins to melt.

2. Beginning near the center and working outward, stir melted chocolate into cream until mixture is combined and smooth (do not overstir).

3. Refrigerate, stirring every 5 minutes, until frosting just barely begins to hold its shape and is slightly lighter in color. Use immediately (ganache will continue to thicken after you stop stirring).

Dark Chocolate Frosting adapted from Martha Stewart's Cupcakes: 175 Inspired Ideas for Everyone's Favorite Treat

Ingredients
  • 1/2 C plus 1 T unsweetened Dutch-process cocoa powder
  • 1/2 C plus 1 T boiling water
  • 2 1/4 C (4 1/2 sticks) unsalted butter, room temperature
  • 3/4 C confectioners' sugar, sifted
  • 1/4 t salt
  • 1 1/2 lbs. good-quality bittersweet chocolate, melted and cooled

Procedure
1. Combine cocoa and boiling water, stirring until cocoa has dissolved.

2. With an electric mixer on medium-high speed, beat butter, confectioners' sugar, and salt until pale and fluffy. Reduce speed to low. Add melted and cooled chocolate, beating until combined and scraping down sides of bowl as needed. Beat in the cocoa mixture.

3. If not using immediately, frosting can be refrigerated for up to 5 days, or frozen up to 1 month, in an airtight container. Before using, bring to room temperature, and beat on low speed until smooth again.

Chocolate-Sour Cream Frosting adapted from Martha Stewart's Cupcakes: 175 Inspired Ideas for Everyone's Favorite Treat

Ingredients
  • 1 lb. (4 C) confectioners' sugar, sifted
  • 1/2 C unsweetened Dutch-process cocoa powder
  • 1/4 t salt
  • 12 oz. cream cheese, room temperature
  • 3/4 C (1 1/2 sticks) unsalted butter, room temperature
  • 18 oz. bittersweet chocolate, melted and cooled
  • 1 1/2 C sour cream

Procedure
1. Sift together confectioners' sugar, cocoa, and salt.

2. With an electric mixer on medium-high speed, beat cream cheese and butter until pale and fluffy. Reduce speed to low. Gradually add sugar mixture; mix until combined. Mix in melted and cooled chocolate and then sour cream, scraping down sides of bowl as needed. Continue beating until smooth.

3. If not using immediately, frosting can be refrigerated for up to 5 days, or frozen up to 1 month, in an airtight container. Before using, bring to room temperature, and beat on low speed until smooth again.

Previous Cupcakes of the Month:
January's Cupcake of the Month: Streusel Cupcakes
February's Cupcake of the Month: Martha's Meyer Lemon Cupcakes
March's Cupcake of the Month: Flourless Chocolate Cupcakes
April's Cupcake of the Month: Tres Leches Cupcakes
May's Cupcake of the Month: Strawberry Cupcakes
June's Cupcake of the Month: Flock of Sheep Cupcakes
July's Cupcake of the Month: Lavender-Iced Brownie Cupcakes
August's Cupcake of the Month: Cookies and Cream Cheesecakes

Click here to see the rest of this post...

Friday, September 24, 2010

CSA Basket 13

This week's basket included: Cucumbers, Tomatoes, Kale, Cilantro, Summer Squash, Green Beans, Basil, Long Beans, Melon, Purple Bell Pepper, Jalapeno, Lettuce, Apples, White Nectarines, Yellow Peaches, Grapes, Avocado, and Butternut Squash. I hit the trade-in basket to unload the cukes, summer squash, and long beans for another avocado, more tomatoes, more peaches, and another butternut squash.

The green beans, apples, nectarines, and peaches have been turned into baby food. While feeding said baby lunch today I thought, "How cool is it that these beans were growing in a field Tuesday and are in my baby's tummy by Thursday?" The grapes, avocado, and butternut squash will likely be split 50/50 between grown ups and baby.

This week's cilantro and basil will likely meet the same fate as last week's cilantro and basil: each in their respective pesto. This week's kale will likely meet the same fate as last week's kale: fried up with a little garlic and olive oil and layered into our homemade version of The Grit's Golden Bowl.

The unspecified melons are totally spherical and about the size of a large tomato. The skin doesn't resemble any melon I've seen before. I'll try to snap a picture of one when we slice it open.

Very excited for my purple bell peppers. Not sure what to do with them other than just slice 'em and chomp.

Click here to see the rest of this post...

Sunday, September 19, 2010

September's Cookie of the Month: Potato Chip Chocolate Chip Cookies


This recipe caught my eye on my very first perusal The Ultimate Chocolate Cookie Book. But it wasn't until I heard Prairie Home Companion's highlights of shows performed at state fairs called State Fair on a Stick that I decided the time was right for Potato Chip Chocolate Chip Cookies, which seem tailor made for the state fair feed lot along side the deep fried Twinkies and the much lauded hamburger with doughnuts instead of a bun.

But these cookies are much more edible than all those questionable comestibles on a stick. My independent taste tester adored them and celebrated the return of yummy cookies with chocolate chips after the previous two months of chiplessness. I liked these cookies more after they cooled as they struck me as a bit greasey when they were warm. This is a bit of a backhanded compliment as so many cookies are only good warm, but the whole point of cookies is that they should be portable, which usually means served room temperature.

You could try to make them a little weirder by substituting flavored chips, like barbecue potato chips, as the authors suggest. I used Sea Salt Kettle Chips, which was probably not the wisest choice. I felt the cookies lacked salt. There is no salt called for in the recipe as it relies on the potato chip to provide the salt. I think my chips weren't sufficiently salty. Now that I'm reading the description of the chip on the Kettle website my suspicions are confirmed,

Our original Lightly Salted just got better! We now use sea salt in our recipe to provide a more natural alternative to regular salt. The sodium content has not changed, and you'll still find the same great Kettle Brand® flavor that you know and love.
Mumble. The next time I make these, and I probably will as they are super yummy, simple, and a bit of a novelty, I'm going to use full-salt high-sodium chips. Or barbecue, as I think the nutmeg would really set off the barbecue flavor well.

Heed the instruction to space the cookies 2 inches apart. These cookies spread, but not ridiculously so. Only such that their crispiness is maximized. Also, the recipe estimates a yield of 4 1/2 dozen cookies, but I only mustered about 30, though mine could have been smaller. But since when is state fair food about appropriate serving sizes?

Potato Chip Chocolate Chip Cookies adapted from The Ultimate Chocolate Cookie Book: From Chocolate Melties to Whoopie Pies, Chocolate Biscotti to Black and Whites, with Dozens of Chocolate Chip Cookies and Hundreds More by Bruce Weinstein and Mark Scarbrough

Ingredients

  • 1 3/4 C all-purpose flour
  • 1/2 t baking soda
  • 1/2 t grated nutmeg
  • 1/2 lb. (2 sticks) unsalted butter, cool, cut into small pieces
  • 1 C granulated sugar
  • 3/4 C packed brown sugar
  • 1 large egg, room temperature
  • 1 large egg white, room temperature
  • 2 t vanilla extract
  • 5 oz. potato chips, crushed
  • 3 C Ghiradelli 60% Cacao chips

Procedure

1. Preheat oven to 350 degrees. Sift the flour, baking soda, and nutmeg into a medium bowl.

2. Soften the butter in a large bowl, using an electric mixer at medium speed. Add both kinds of sugar and continue beating until the mixture is homogeneous but grainy, not smooth, with no bits of butter visible, about 2 minutes. Scrape down the sides of the bowl, beat in the egg, then the egg white and vanilla.

3. Add the prepared flour mixture and beat at low speed just until a sticky and thick but nonetheless soft batter is formed. Stir in the crushed potato chips and chocolate chips, just until evenly distributed.

4. Drop by rounded tablespoonfuls onto two large baking sheets lined with silicone mats, spacing about 2 inches apart. Bake for 8 minutes, then rotate the baking sheets top to bottom and back to front. Bake for another 7 minutes, or until lightly browned and somewhat firm to the touch. Cool on the baking sheets for 2 minutes, then transfer to wire racks to cool completely. Cool the baking sheets for 5 minutes before baking further batches.

Previous Cookies of the Month:
January's Cookie of the Month: Soft Chocolate Chip Oatmeal Cookies
February's Cookie of the Month: Chocolate Cream Sandwich Cookies
March's Cookie of the Month: Classic Chocolate Chip Cookies
April's Cookie of the Month: Banana Chocolate Chip Cookies
May's Cookie of the Month: Butterscotch Chocolate Chip Cookies
June's Cookie of the Month: Honey Chocolate Chip Cookies
July's Cookie of the Month: Big Soft Chocolate Cookies
August's Cookie of the Month: Viennese Chocolate Pepper Cookies

Click here to see the rest of this post...

Thursday, September 16, 2010

Raspberry Bars


These are seriously yummy. I don't usually like raspberry flavored desserts that much but I had raspberries from my berry CSA that needed to be used. I only made half a recipe because I only had 8 ounces of berries. It worked just fine. Also, I only greased the pan (without also flouring it or using parchment) and things were just fine.

Quick lunch


This soup is quick to make and kept me from eating too much junk for lunch this week. (Except for Friday when I left for work without eating lunch and ended up just having many cookies at the tea...)

White Bean and Kale Soup

Saute a couple of cloves of garlic in a little olive oil. Add some diced carrots and cook a few minutes. Add two cans of white beans, a large bunch of kale and 3-4 cups of vegetable or chicken stock. Cook until kale is soft. Smash some of the beans to add body to the soup. Season with salt and pepper.
Posted by Picasa

Carrot and Walnut Muffins


These muffins were originally made for the math tea. They were so good that Bob and I ate more than a couple and so I had to make a second batch. The second batch was accidentally made with half the sugar but they were just as tasty. You could easily make these without the nuts. I think they would also be good with raisins, especially if you used the smaller amount of sugar.

Recipe from Williams Sonoma's Muffin Cookbook

4 large eggs
1 cup canola oil
1 to 2 cups sugar
3 cups flour
2 teaspoons baking powder
1 teaspoon baking soda
1/2 teaspoon salt
2 teaspoons cinnamon
1/4 teaspoon allspice
3 or 4 carrots (12 oz) peeled and shredded
1 1/2 cups walnuts

Preheat oven to 350F. Grease 24 muffin cups or line with liners.

In a large bowl combine the eggs, oil and sugar. Whisk until smooth and slightly thickened, about 1 minute.

In another bowl, stir together dry ingredients. Add to the egg mixture and stir until smooth. Fold in the carrots and the nuts.

Spoon batter in the muffin cups. Bake until golden, dry and springy to the touch, 20-25 minutes. Cool in pan 5 minutes.


Posted by Picasa

Click here to see the rest of this post...

Friday, September 10, 2010

CSA Basket 12


This week's basket contains: Tomato, Lettuce, Basil, Cilantro, Summer Squash, Cucumbers, Long Beans, Lemon Cucumbers, Grapes, Kale, Apples, Cabbage, Corn, Reed Avocado, Nectarines, Peaches, Melon, and Grapefruit.